
Draw your room
Set room dimensions and use optional bounded room outlines.
On this page
Start with a rectangle, then shape it around your setup. The room is a map for notification positions—not automatic calibration or a simulation of light through walls.
Start with the rectangle
- Open Room. Rectangular editing is the default; there is no need to open the outline editor for an ordinary room.
- Choose Square, Wide or Long for a starting proportion, or drag the bounding floor edges to adjust width and depth.
- Drag the upper edges for height. For exact values, expand Measurements and enter Width, Depth and Height.
- Middle-drag to orbit the view; the reset-view control restores the camera. Neither changes the setup.
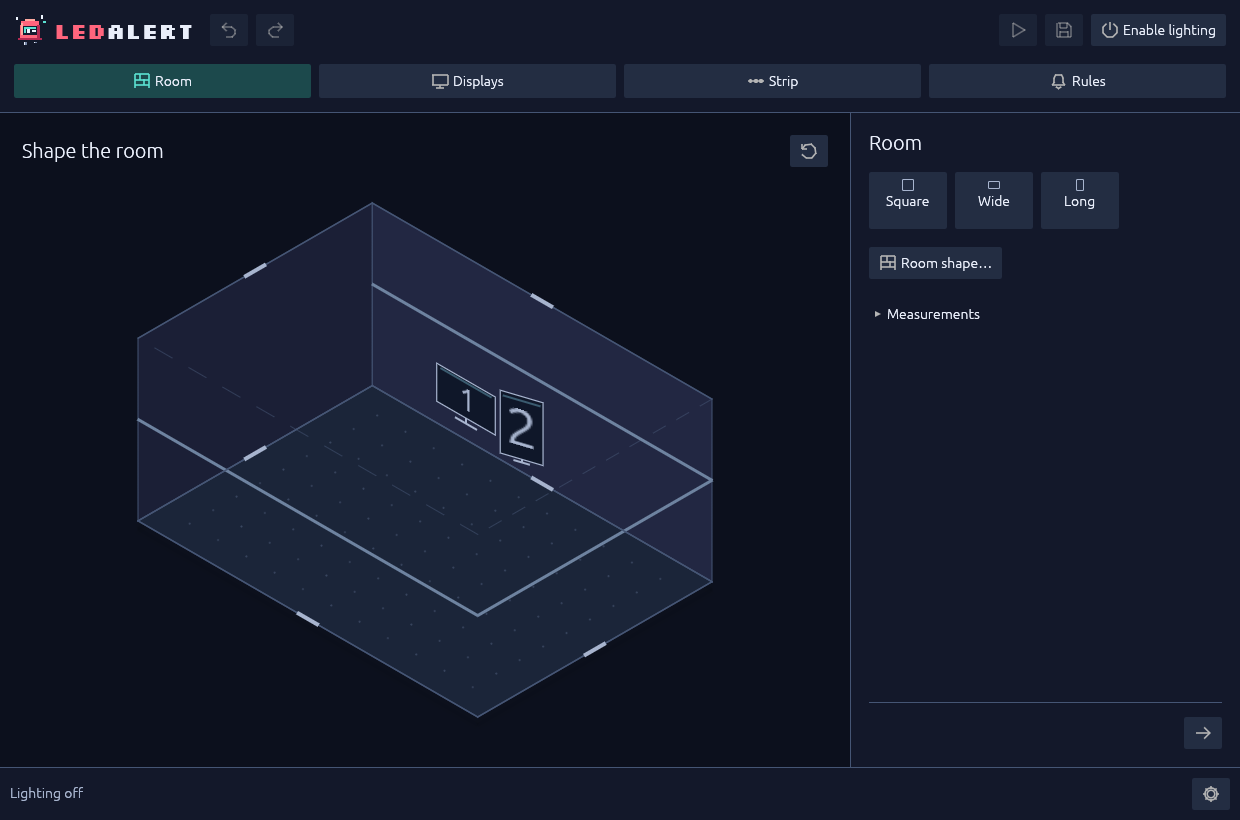
Start with a rectangle and adjust its proportions.
Measurements use meters (m), with room dimensions from 0.5 to 50 m. Both 3.75 and 3,75 work; do not mix separators or use thousands grouping. Press Enter or leave a field to commit. Display rounding does not change saved geometry. Consistent proportions are enough to begin.
Choose an outline only when you need one
For an L-shaped room or a custom footprint:
- Select Room → Room shape…. This opens the optional top-down editor.
- Choose Rectangle or L-shaped as a starting outline.
- Drag a corner dot or the middle grip of a wall. Snap · 5 cm is available; clear it for finer movement.
- Select a corner to reveal Across / Along measurements. Add corner inserts a corner on its outgoing edge; the trash action removes the selected corner.
- Use Rotate outline to turn the footprint within its existing width/depth box.
- Select Done to return to the 3D workbench. This closes advanced editing; it does not save or enable lighting.
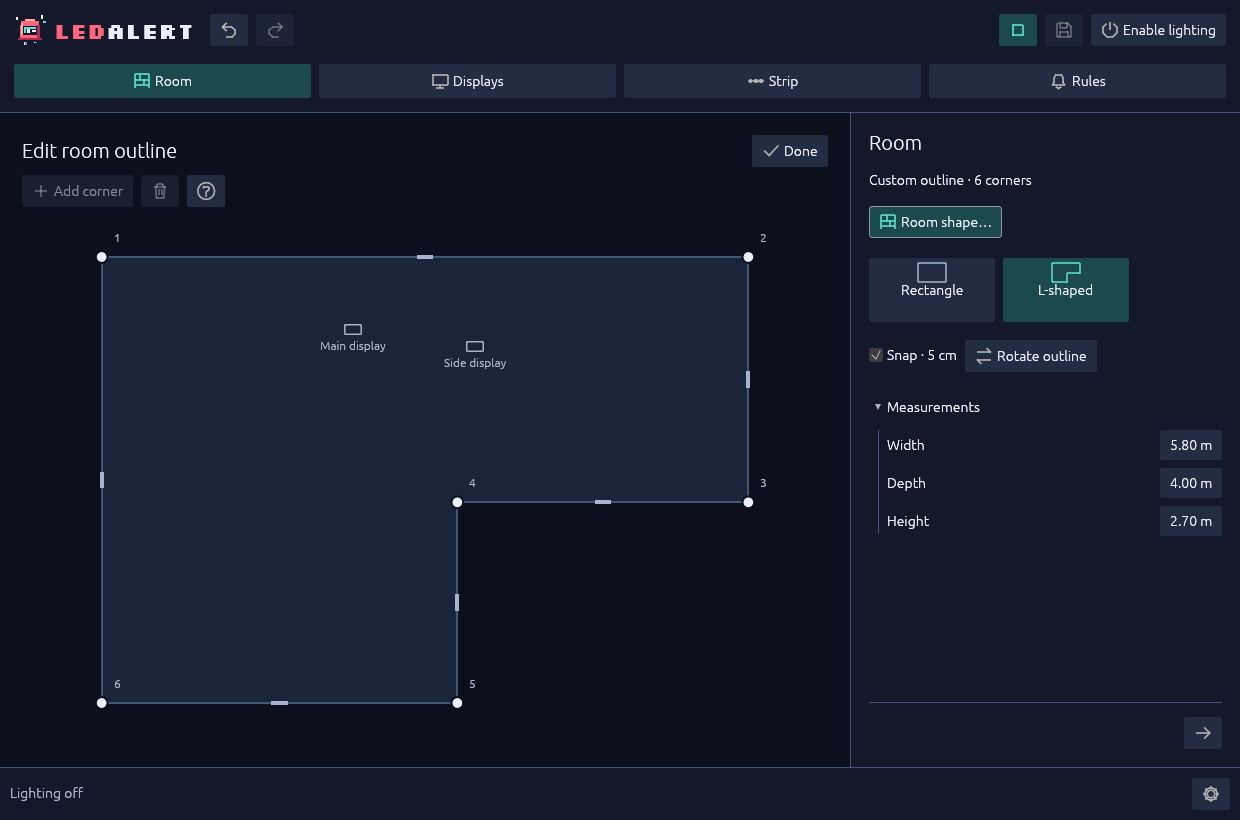
Use the top-down editor for corners and walls.
Custom outlines have 3–12 corners and a uniform height. Keep adjacent corners at least 1 cm apart. Self-intersections, overlapping edges and holes are invalid. There are no internal partitions, multiple rooms or curved walls.
Know what an edit moves
| Your action | What happens to the existing setup |
|---|---|
| Change Width / Depth / Height, drag room-size edges, or choose rectangle proportions | Room resizing scales placement proportionally and preserves LED allocation indices. |
| Change only the outline, including Rotate outline | Display anchors, strip points, LED allocation and rule anchors stay where they were. Nothing is silently fitted to the new footprint. |
| Choose Strip → Starting placements → Around room, or apply an Along walls route | Explicitly replaces the strip path using the current perimeter and resets its allocation. Review direction and allocation afterward. |
If the strip follows new walls, replace its route. Undo restores the previous route and allocation.
Resolve red spans before saving
A new outline can leave existing placements outside the room. Red spans and the conflict count identify the problem:
- Move the affected display anchor or strip points back inside.
- Add a bend where a strip span would cut across a concave corner. The whole span, not just both endpoints, must remain inside the footprint.
- Adjust the outline to include the existing placement, or use Undo.
Display containment checks the display's floor anchor; it is not a calibrated enclosure check for every part of a physical monitor.
Invalid drafts pause output and cannot overwrite a valid save. If lighting is enabled, a valid same-device correction can resume output; editing is not a disarm. Missed notifications are discarded. Leave lighting disabled for local-only editing.
Corner and edge drags each form one undo step. Use Undo / Redo or Ctrl+Z / Ctrl+Shift+Z; leave a text field first when you want whole-editor history rather than text editing.
Save and continue
Use Save or Ctrl+S to save the valid setup. Finish also saves and opens the finished view without granting lighting permission; select a top tab to edit again.
Next: Place displays. For exact bounds and storage semantics, see optional room outlines and configuration.